Are you looking for ways to make the most out of your print marketing budget? Have you been asked to cut costs, reduce waste, or meet new sustainability metrics? Is your print budget at-risk if you can’t improve ROI?
You’re not alone. Many of our customers share the same concerns. Luckily, in many cases, we can help them save money and reduce waste by making the most out of each press sheet.
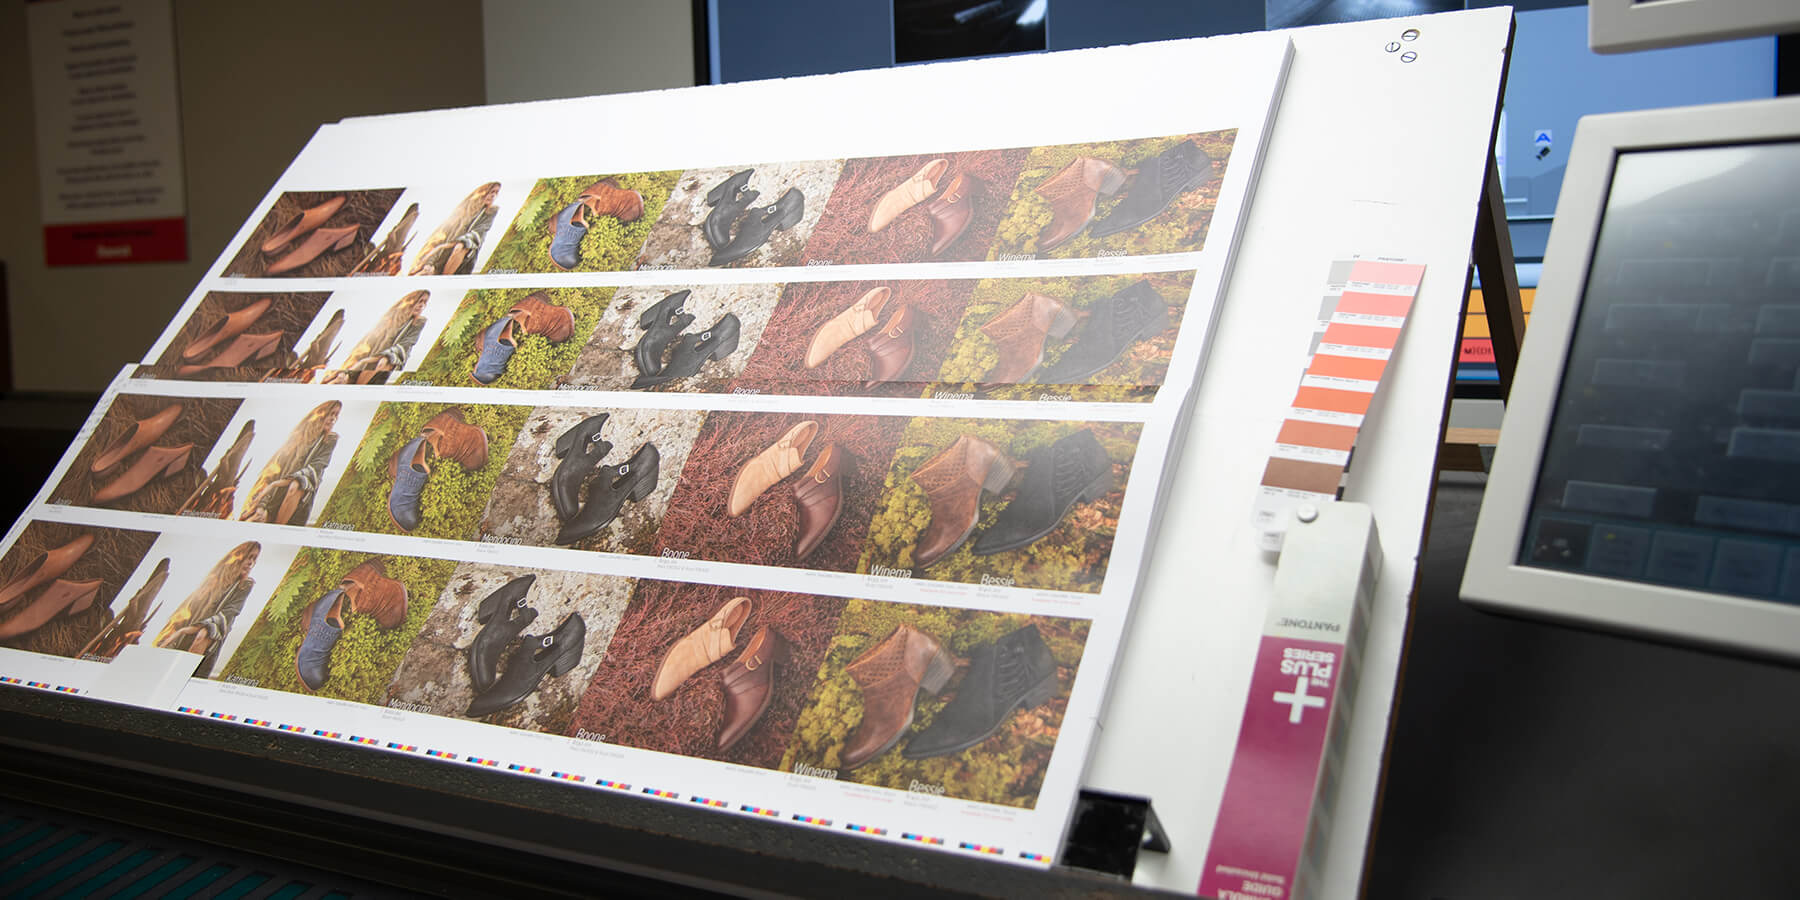
While there are many factors that contribute to print costs, the press sheet is an area that’s often overlooked by creative teams. And that makes sense. Designers are busy figuring out how to wow their audience with engaging and effective print design, and proper imposition might not be top of mind.
That’s why we’re sharing some best practices and advice for making the most out of your press sheet. By using your press sheet wisely, you can save on paper costs and increase efficiency which will help you maximize your print budget and return on investment.
When planning your next print design project, follow these tips to make the most out of your press sheet.
Plan Your Print Specs to Know Your Press Sheet Size
Most designers think in terms of the final product, but printers tend to work backward. To ensure that your project is printed efficiently, you’ll want to adopt a similar mentality. Before you launch into your design software, create a sketch of your piece to determine the finished size, as well as the flat size. The flat size represents the overall dimensions of your design before any folding or finishing takes place and it serves as the foundation upon which the rest of your print specs are built.
After defining the flat size, you’ll want to think about the type of stock you want to print on and the total quantity. There are a few other considerations, but for the most part, this info will determine whether your job is printed digital or offset, which in turn determines press sheet size.
Relate Flat Size to Press Sheet Size
The paper that runs through the press depends entirely on the size of the press, so it’s a good idea to know what type of equipment your printer has before moving forward. Here are some of the common offset and digital press sizes.
- 12 x 18 inches (digital)
- 13 x 19 inches (digital)
- 19 x 25 inches
- 20 x 26 inches
- 23 x 29 inches
- 23 x 35 inches
- 25 x 38 inches
- 26 x 40 inches (for cover stocks only)
- 28 x 40 inches

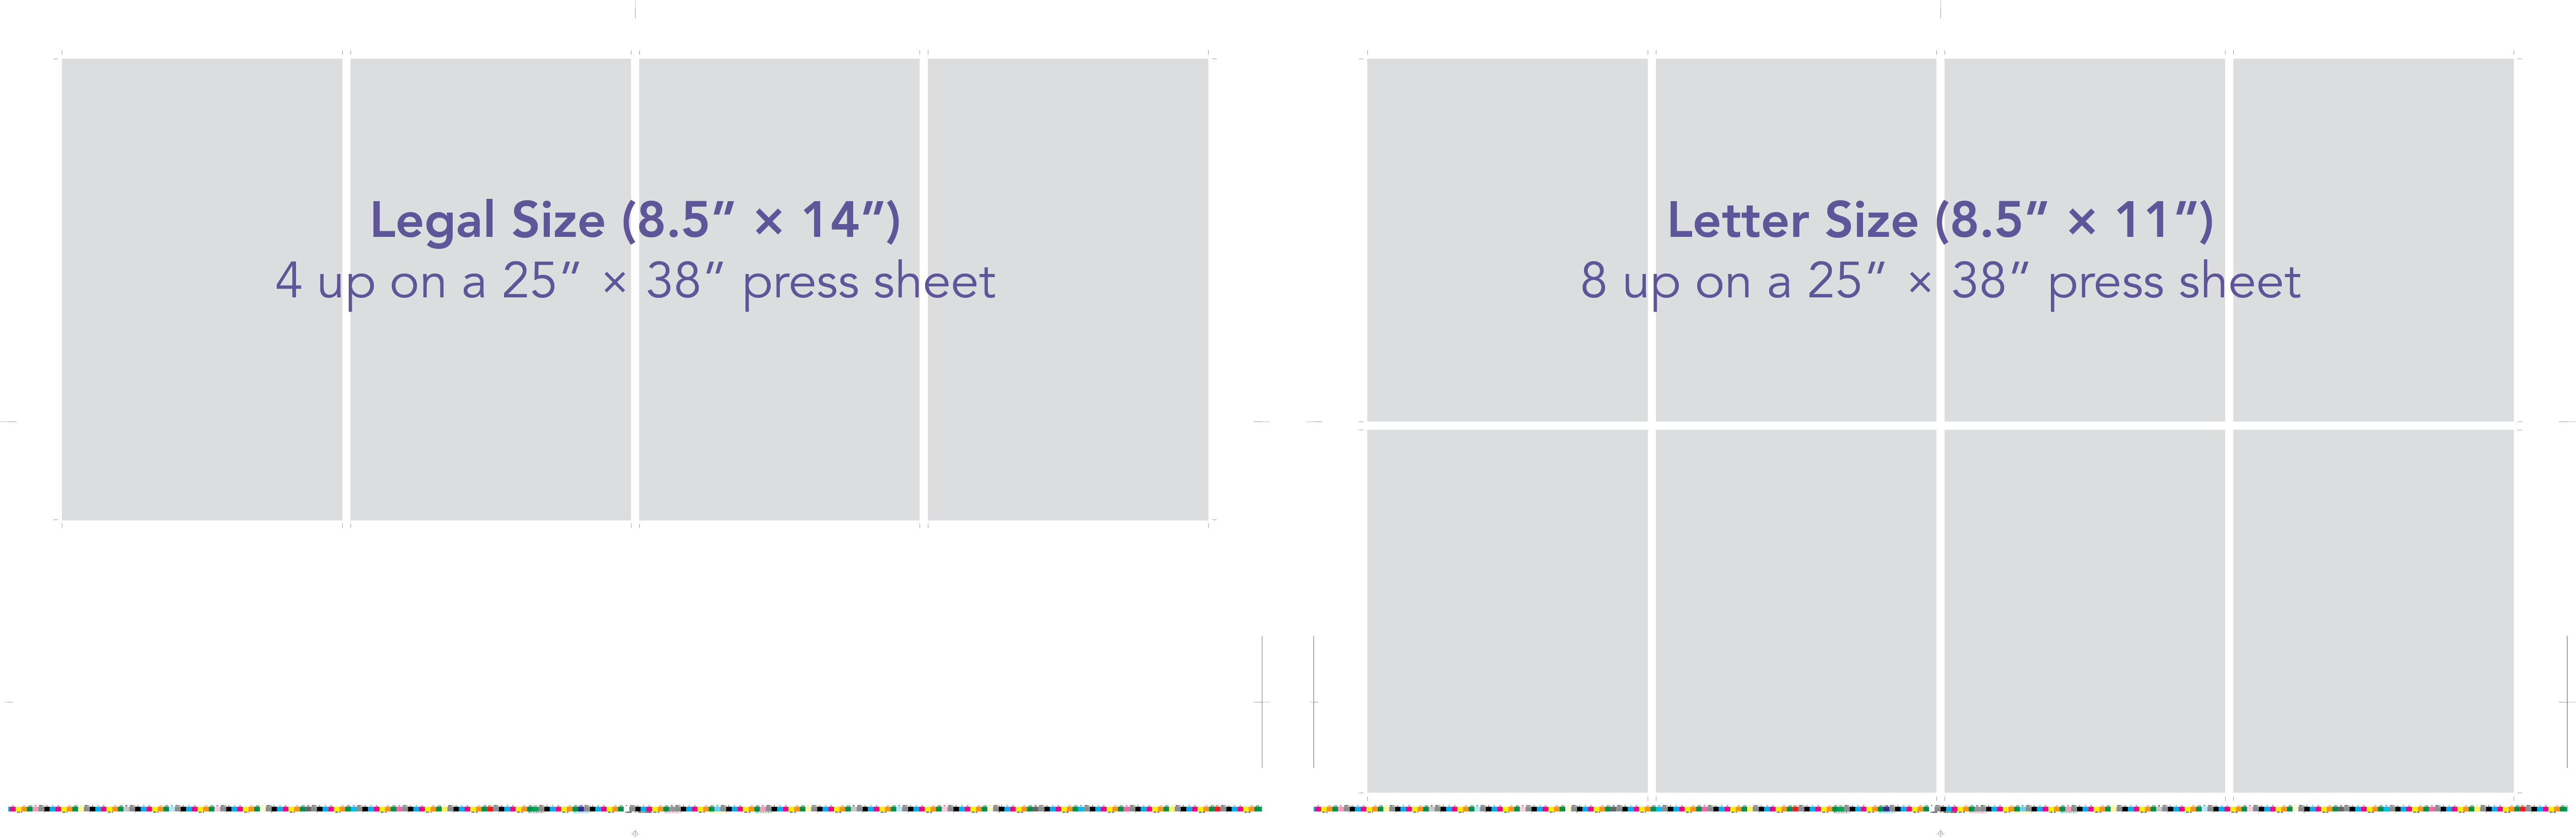
To maximize the press sheet, think about how many times you can fit your flat size within the press sheet dimensions. You’ll have to account for some print requirements (see the section below) but this is a helpful way to visualize how your project will be printed. Plus it can also help you identify small changes that can have a big impact on cost.
For example, if you’re designing a poster and you had originally planned for legal size (8.5" x 14"), you’ll have a lot of waste in your press sheet. But maybe it doesn’t need to be that size exactly? If you have some flexibility and change your size to 8.5" x 11" you could fit 8 up on your press sheet, reducing your waste by 25%. Depending on the total quantity printed, this could yield significant cost savings. By reducing the number of press sheets needed, you’ll also reduce the press run time—which lowers power and ink consumption in the process.
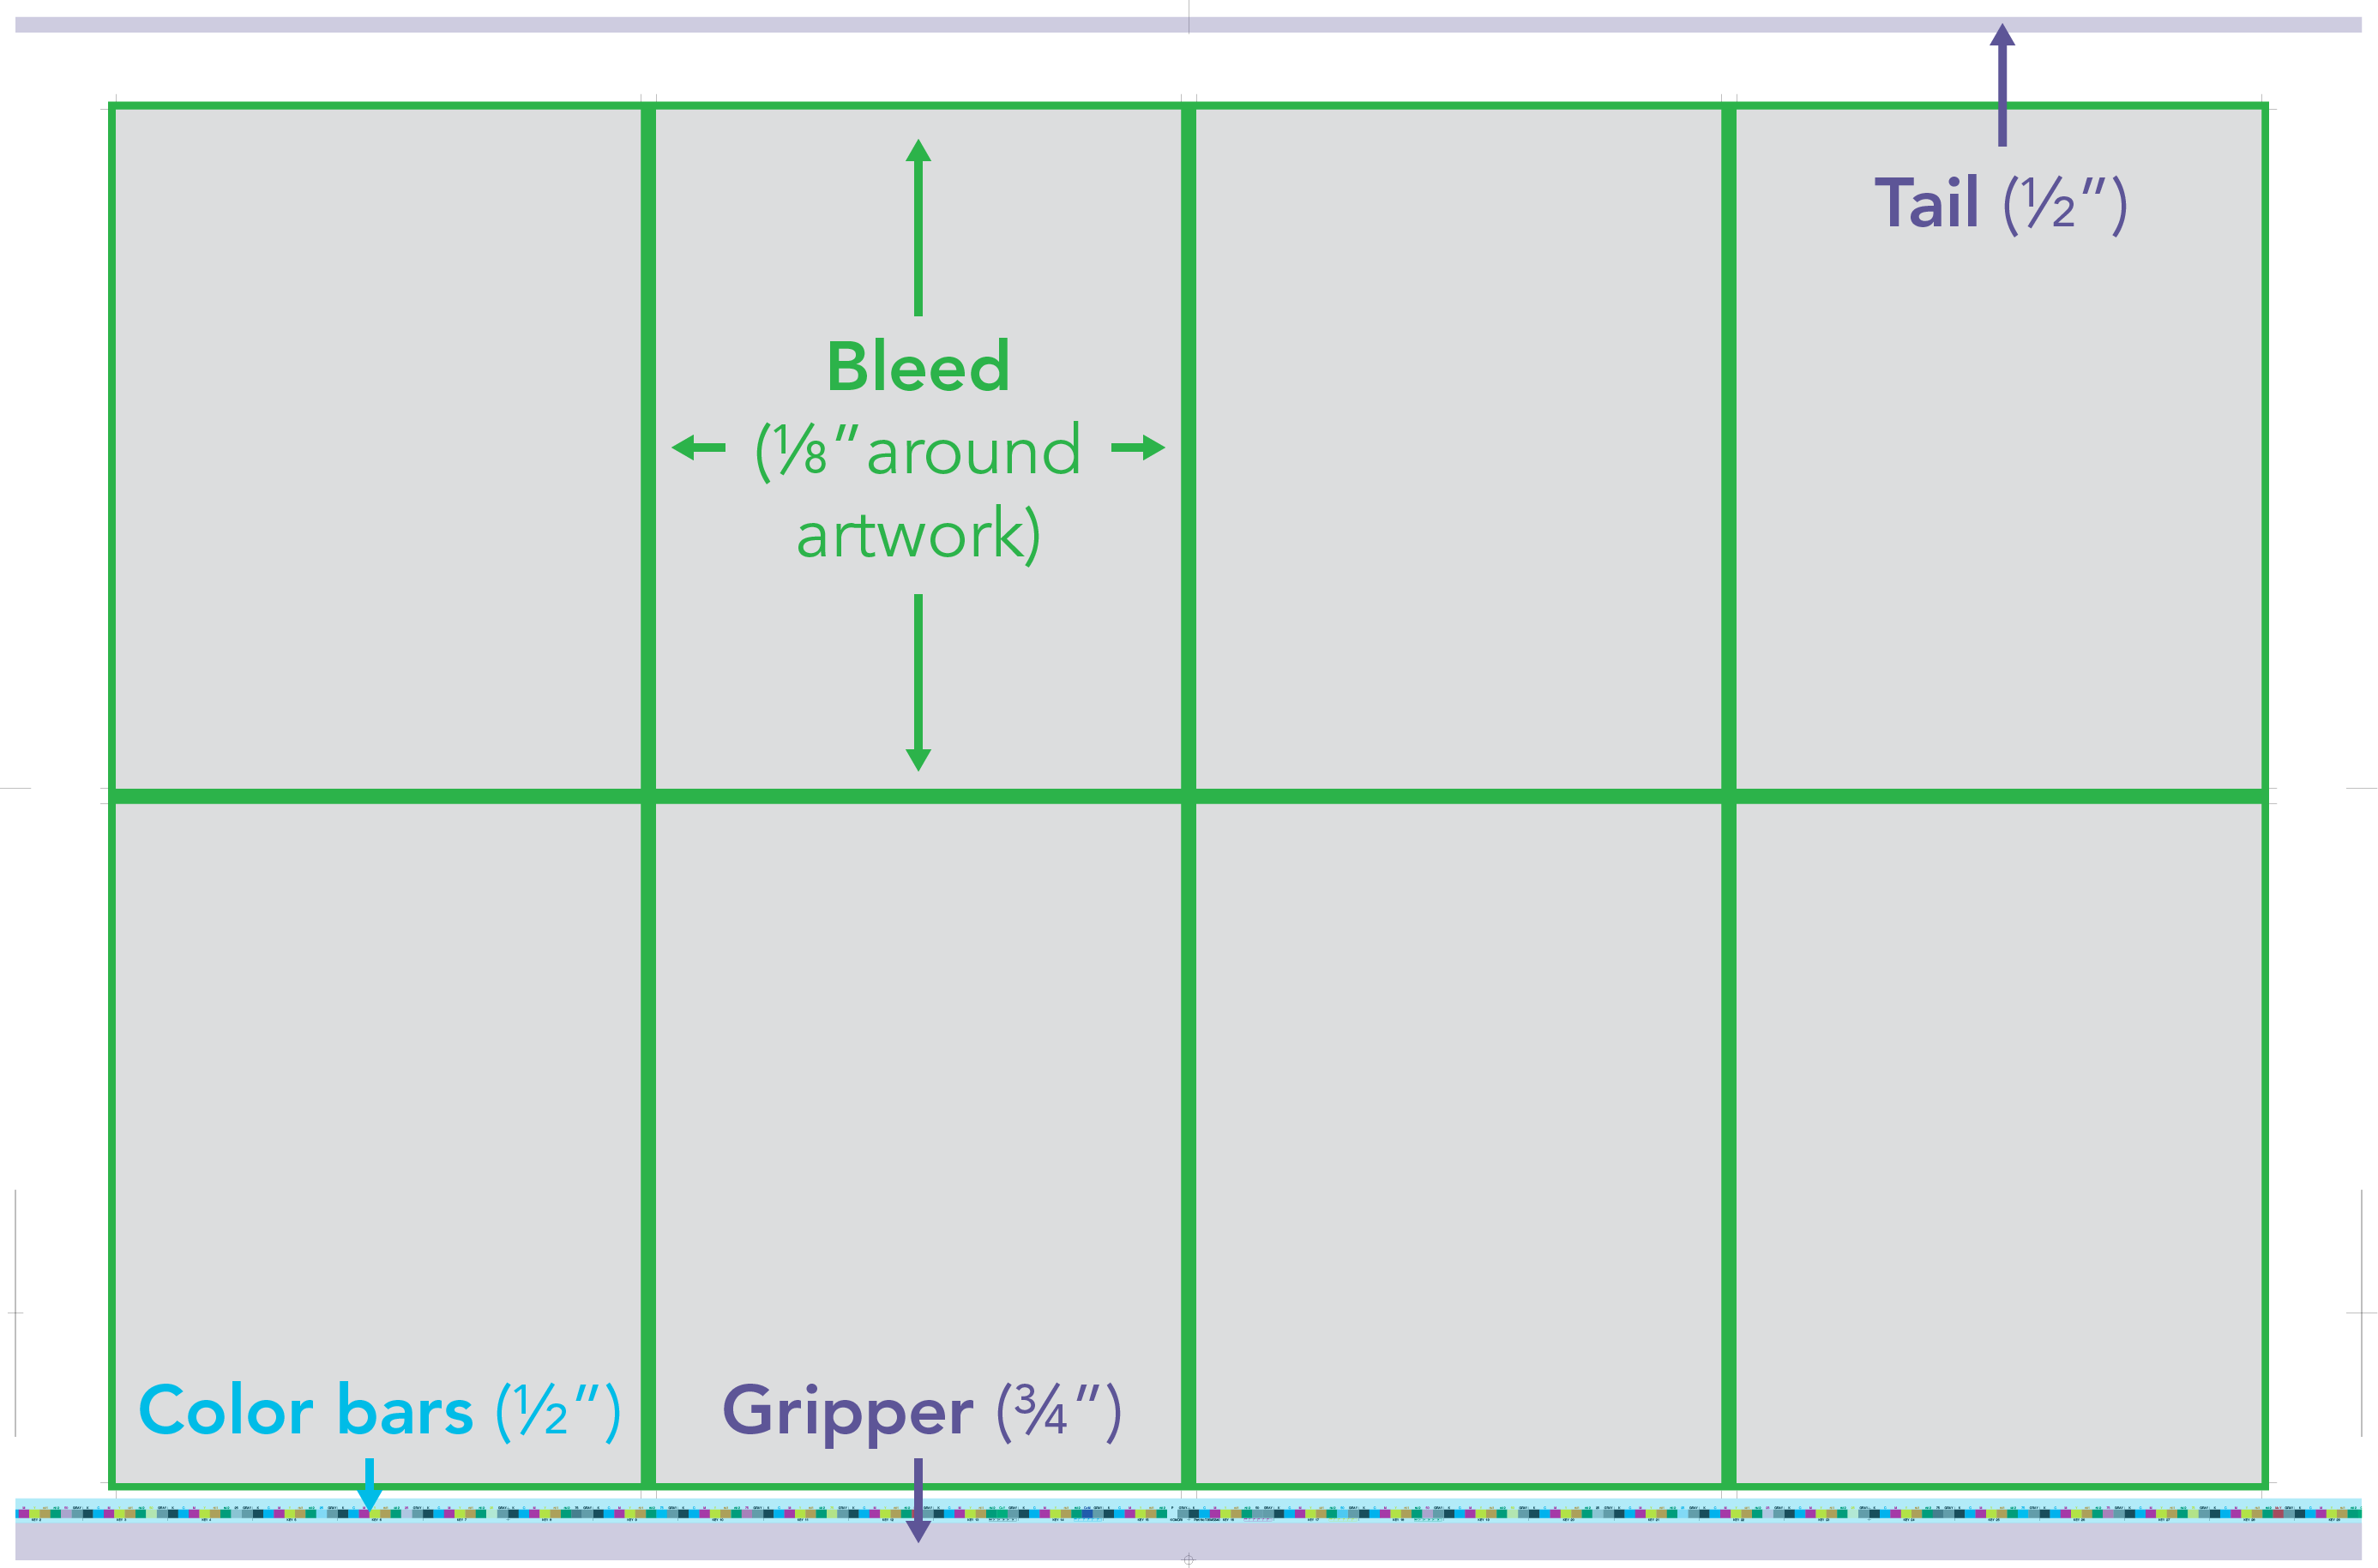
Account for the Gripper, Tail, Color Bars, and Bleeds
Although you should plan to use as much of your press sheet as possible, there are some areas that you’ll need to leave untouched.
Leave room for the gripper and the tail—the metal fingers that grab the leading edge of the sheet and pull it through each section of the press. Most printers recommend leaving ¾ inches of blank space for the gripper and ½" for the tail for offset work.
Digital sheets are a bit different, as the grippers grab on all sides. Suffice it to say, for digital your max printing area for a 12" x 18" sheet is 11 27/32" x 17 15/32" and 12.5" x 18.5" for a 13" x 19" sheet.
Next, if you're printing offset, you’ll need to account for color bars which are used to measure ink density. Typically the color bars are located across the bottom or top of the press sheet along the horizontal axis. We generally recommend leaving ½" space for them.
Finally, and perhaps most important, you’ll want to make sure to include space for bleeds. Bleeds are a method of extending your artwork past the trim line (by typically ⅛ of an inch or .125" on each side) so that there are no white edges when the final piece is trimmed. You’ll need to account for these dimensions when estimating how many pages you can fit side-by-side on a press sheet.
Use All Available Space
Once you’ve accounted for grip, tail, color bars and bleeds, you should fill as much of the rest of the press sheet as possible. Unlike with design, when it comes to the press sheet white space is not your friend. The cost of print is directly associated with the number of print pieces you can get on a press sheet. The more pieces you can get on a sheet, the fewer number of sheets need to be used. And since paper can account for nearly 30-50% of your print costs, you’ll want to make sure you use as much of the available real estate as possible—outside of the areas noted above.
Combine Multiple Versions
If you’re working on a project that has multiple versions—such as multiple data sheets with the same printing specs—it’s a best practice to combine those wherever possible. Assuming the overall flat size allows you to put several up on the press sheet, you should always run the versions together, a process typically referred to as “gang printing.” This reduces the number of press sheets and the cost of additional plates and press setup time.
Alternatively, for smaller quantities, your printer may recommend producing the job digitally, particularly if your job is going to be mailed. By printing digitally, you’ll be able to take advantage of variable data printing to create multiple versions of your piece, each of which can be tied directly to the recipient. And although the press sheet size may be smaller with digital, because each piece is printed with variable text and images (including the recipient’s mailing information if needed), it may not need to be collated or assembled which saves a step in the final areas of the production process.
Be Aware of Your Timeline
Your deadline may not have a lot to do with how you utilize the press sheet, but it does have a lot to do with the availability of your paper stock. If your job is a rush, there is no guarantee that the paper you request will be in-stock and available quickly, especially if you are printing a large volume.
In order to meet your deadline, printers may have to suggest alternative stocks which could have an effect on press sheet size and, ultimately, your design. Even if your press sheet size changed by a few inches, it could result in one fewer piece up on a sheet (and more waste) or the need to go back and change the design which will delay your project.
Provide Clean Lists for Direct Mail
If your project is going to mail, be sure to clean your list prior to submitting your project for print. An experienced mail service provider will run your list through NCOA (National Change of Address), but that isn’t fool-proof. NCOA will only report incorrect addresses if recipients have updated their information with USPS and some data suggests that only 50% of people who move do so. If you have other data sources, such as your customer database or order history, cross reference those with your mailing list and make updates wherever possible.
Along with address corrections, it’s a good idea to review your data for contacts that are not engaged. These may be customers that haven’t purchased in several years or unqualified prospects that have ended up in your database. To get the most out of your direct mail campaign ensure that you’re sending to highly targeted people who are likely to act on your offer. This may result in a smaller list size, but you won’t be wasting time, money, and paper sending your campaign to the wrong people.
Stick to Standard Sizes When Possible
It’s always best to stay as close as possible to standard sizes to optimize the total number of pieces you can get on one press sheet. The most common sizes include 8.5" x 11", 5.5" x 8.5", and 6" x 9". This reduces waste and allows you to print fewer pages which will, in turn, cost you less money.
Request a Making Size Stock
If time allows, it is possible to get a making size stock, which is basically a custom size press sheet to further maximize your use of the available space. This option is typically only available for large quantity orders and will depend on the specific paper stock that’s been selected. If the paper mill offers that particular stock on a roll and the order is for at least 5,000 lbs of paper, a making size stock can save a considerable amount of money.
Maximizing Your Press Sheet Helps Maximize Your Budget
Maximizing your budget is all about making smart choices, and the press sheet is a great place to start. Small design adjustments that maximize the press sheet will save money, reduce waste, and create additional print design opportunities. By designing with the press sheet size in mind, you’ll have more room in your budget to consider unique coatings, die-cuts, or other specialty print effects that will draw your audience in.
These press sheet tips can help you stretch your budget and explore new possibilities in print, but if you have any questions just contact us. We’re happy to help you find ways to get the most out of your press sheet and maximize your ROI.