A dieline is a vector file (usually created using Adobe Illustrator) that is used to create a unique die for your project. If it helps, think of a die as a custom cookie-cutter, but for print projects!
Not all projects need to be cut with a die—straight cuts and some shape cuts can be accomplished with other cutting methods—but it’s definitely the standard for creating custom projects, especially at higher quantities.
Creating dielines from scratch can be a painstaking process for graphic designers. If the format is fairly complex, you could spend a good portion of your allotted creative hours just making your dieline. It’s also a process that can bring many designers outside of their comfort zones, particularly if they do not have a lot of experience with manipulating vectors in Adobe Illustrator.
Pro Tip: More intricate dies—such as pocket folders—may involve a fair amount of math, so it’s best to double check your measurements or ask for help.

The good news: our team works with hundreds of dielines per year and we’ve compiled some tools and best practices to make your job easier. So don’t fear the die-cut! Before you embark on your next print project, check out our tips below:
Search for Dielines Online
There are many readily available resources online to help you create dielines—from the simple to the complex. From Shawmut’s own dieline library to resources from our valued partners Neehah and Mohawk, you’ll find lots of pre-existing die files which will save you tons of time.
This search can also be a source for creative inspiration—you might find a certain shape or layout you hadn’t previously considered!
Pro Tip: Any dieline can be modified to fit your unique project.
Keep and Eye on Finished and Flat Size
The finished size of your piece is just that—the size your piece will be when it’s folded and complete. This is the most important consideration, as it will dictate all of your other measurements. The flat size of your piece is the unfolded view, as it will print.
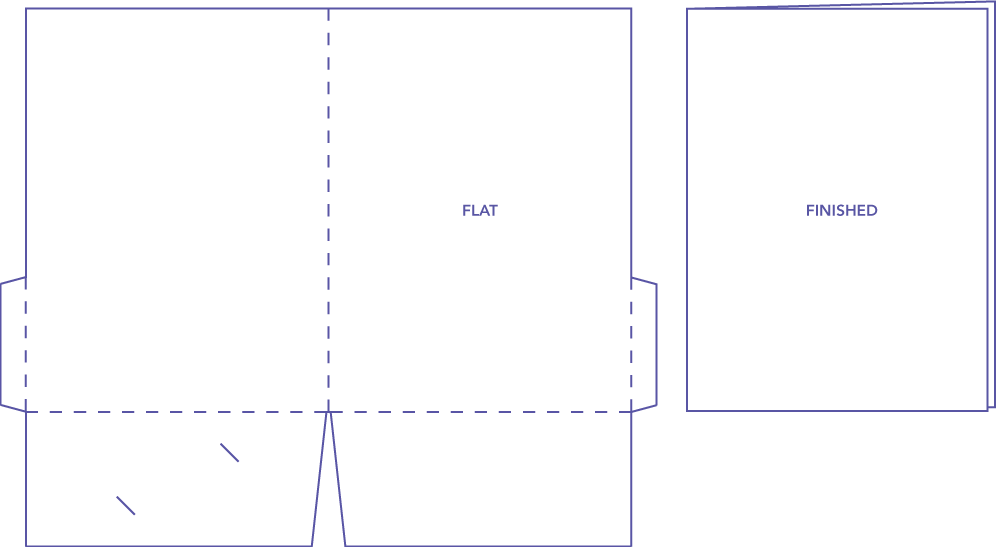
Pro Tip: Your flat size will dictate whether your piece can be produced on a digital press or an offset press.
Sketch & Plan Your Measurements
You may not need to pull out the sketch book for a simple pocket folder, but for more creative and interesting formats it can be a worthwhile step. Seeing your concept on paper first can help you identify potential issues early on.
![]() Pro Tip: Go from sketchbook to screen and back again! It can be helpful to make your calculations directly in Illustrator—try multiplying or dividing right in the Width or Height windows!
Pro Tip: Go from sketchbook to screen and back again! It can be helpful to make your calculations directly in Illustrator—try multiplying or dividing right in the Width or Height windows!
Paper Stock and Substrate Considerations are Critical
The paper stock or substrate you print on are important decisions for any print project. However, they are critical for complicated print projects that include dielines and multiple folds.
Pro Tip: If you’re planning on including multiple nesting folds, you may want to consider a lighter-weight stock.
Use Design Software to Your Advantage
Take advantage of the native tools in Illustrator to save yourself some time and effort down the line. The Polygon tool is great for creating simple shapes that can combine into something more complex, such as an shape-cut accordion brochure. Use the Outline view to see the actual boundaries of your shapes, and the Align and Pathfinder tools for perfect alignment.
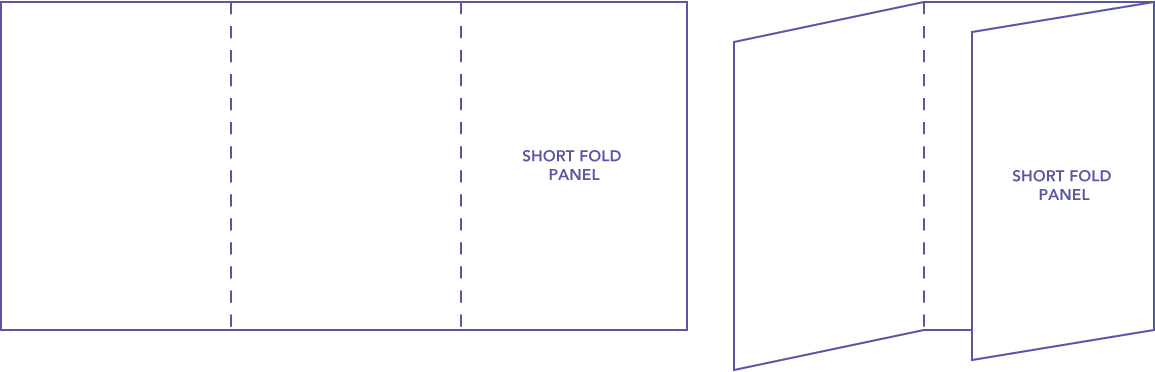
Pro Tip: If your project features nesting folds, you may need to include one or more “short folds,” where one or more panels has a narrower width. Examples include roll-fold or gate-fold brochures.
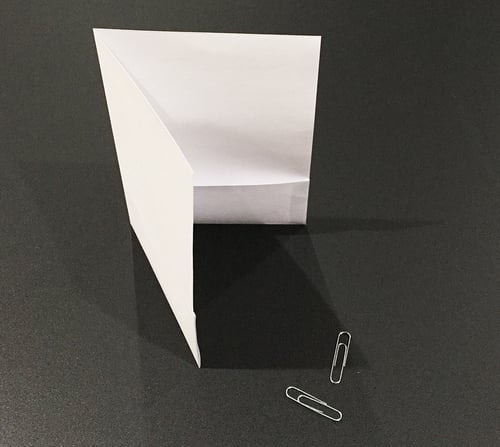
Make Mockups and Test
When you have your rough dieline created, test it! We’re fans of the “mini-mockup,” a tiny version of your project, created from a simple laser print and built by hand. It may seem unnecessary, but we’ve found many potential issues can be identified and solved simply by testing!
Pro Tip: Need another set of eyes? Don’t be afraid to ask for help, that’s what we’re here for!
Design and Print
When you’re ready to design, create an InDesign document using the flat dimensions of your dieline and add a .125” bleed. Place the dieline on its own layer and get creative!
Pro Tip: Take a look at our print-ready checklist for best-practices on setting up your files and packaging them for print. When you’re ready to print, use our upload guide to submit your files and we'll make your creativity a reality.