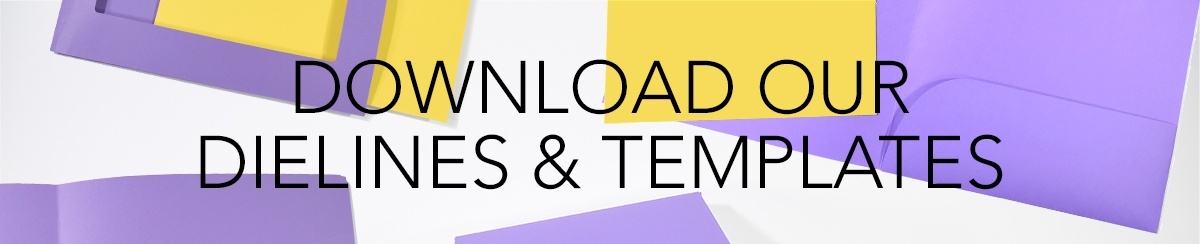
Want to incorporate a die-cut in your next print or direct mail project but not sure where to start? One of the best ways to gather ideas and best practices for die cutting is to review what other designers have done. Sure, you can get some awesome visual ideas from a Pinterest or Google image search, but that won’t provide much detail on what made that project successful (or not).
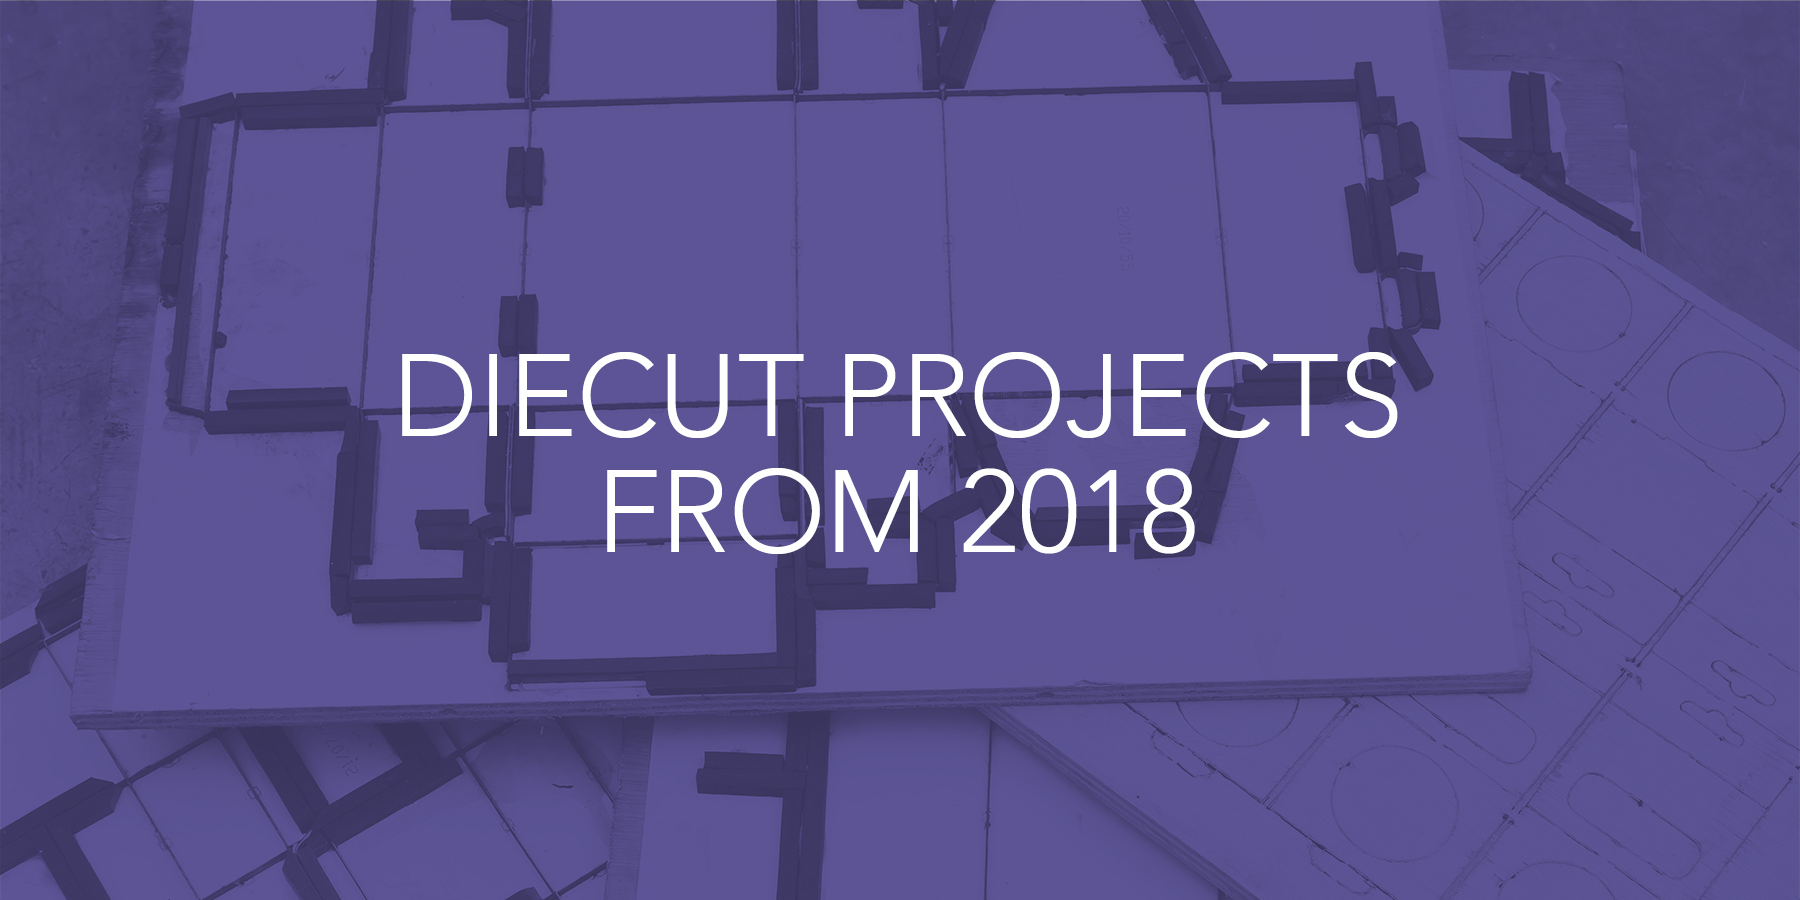
To help we’ve gathered up some of our most eye-opening die-cut projects from 2018. While some of them may inspire you creatively, others offer important lessons on form and function. In the past year, we’ve produced nearly 200 die-cut projects for our clients and each one offers unique lessons for print designers. From postal considerations to the significance of paper stock, there are many variables that can make or break a die-cut project.
So before you start creating your dieline, check out these five examples from 2018 with tips to ensure your next die-cut project runs smoothly.
CarGurus Holiday Card Mailing and Envelope
Unique die cuts are a common theme among holiday cards and this example from CarGurus is no exception. They wanted to create something unique and turned to Shawmut for some creative ideas. After we presented a few options, the CarGurus design team got to work applying the concepts to their brand.
CarGurus was also looking for a specific shade of red for the holiday card envelopes. Unfortunately, the color wasn’t available as an “off-the-shelf” premade envelope. As a result, we recommended a custom envelope using Neenah’s Classic Crest Linen Cover in Red Pepper, which was the perfect shade. By die-cutting and converting flat cover weight sheets—rather than using pre-converted envelopes—we were able to get them the color they wanted in an elegant linen finish.
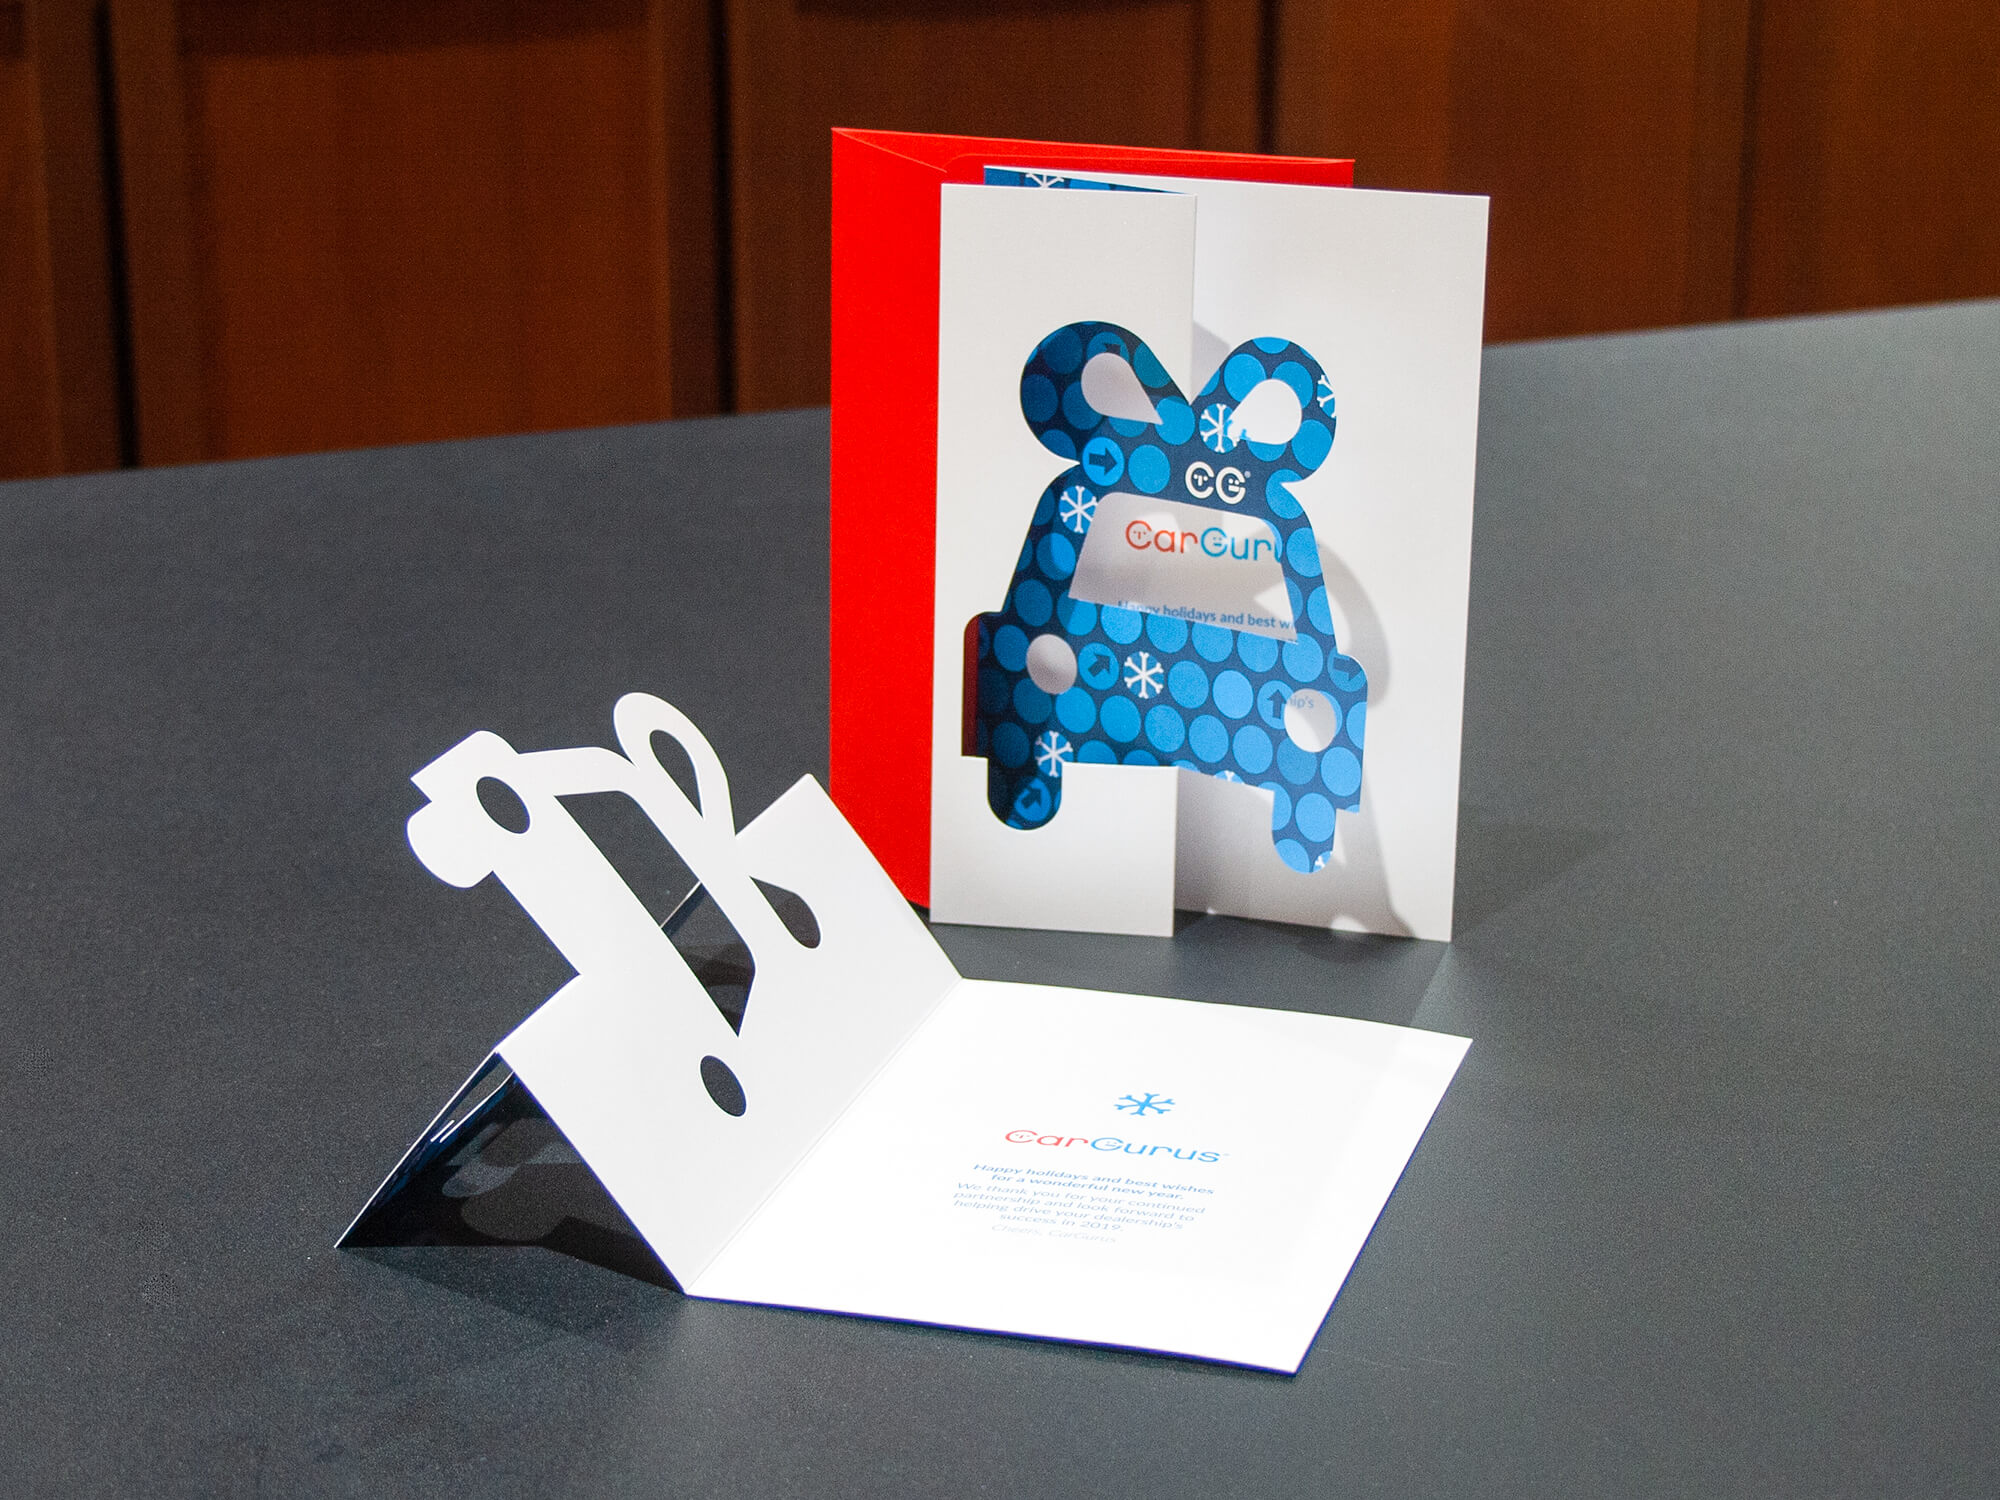
Pro Tip: When preparing your artwork, plan for minor fluctuation in the registration of the die-cut to the artwork (1/16 inch or less) by including a bleed that’s at least 1/16 of an inch.
obp ONETRAC Product Die-Cut Trade Show Handout
When your company is exhibiting at a trade show there are a number of ways to create brand awareness beyond your booth space. One option is to purchase or negotiate a trade show bag stuffer as part of your exhibit booth package. When attendees check-in at the registration desk they’ll be handed a bag filled with promotional materials from various companies at the show. More often than not, those bag stuffers are 8.5 x 11” inserts or other standard size pieces of marketing collateral.
So why not stand out by creating an insert with a unique shape using a die-cut? That’s what we suggested for opb to help them draw more traffic to their booth at their annual plastic surgery trade show. Our designers created a die-cut insert that featured a life-size image of their product—giving doctors a preview of the free sample they could get by visiting the booth.
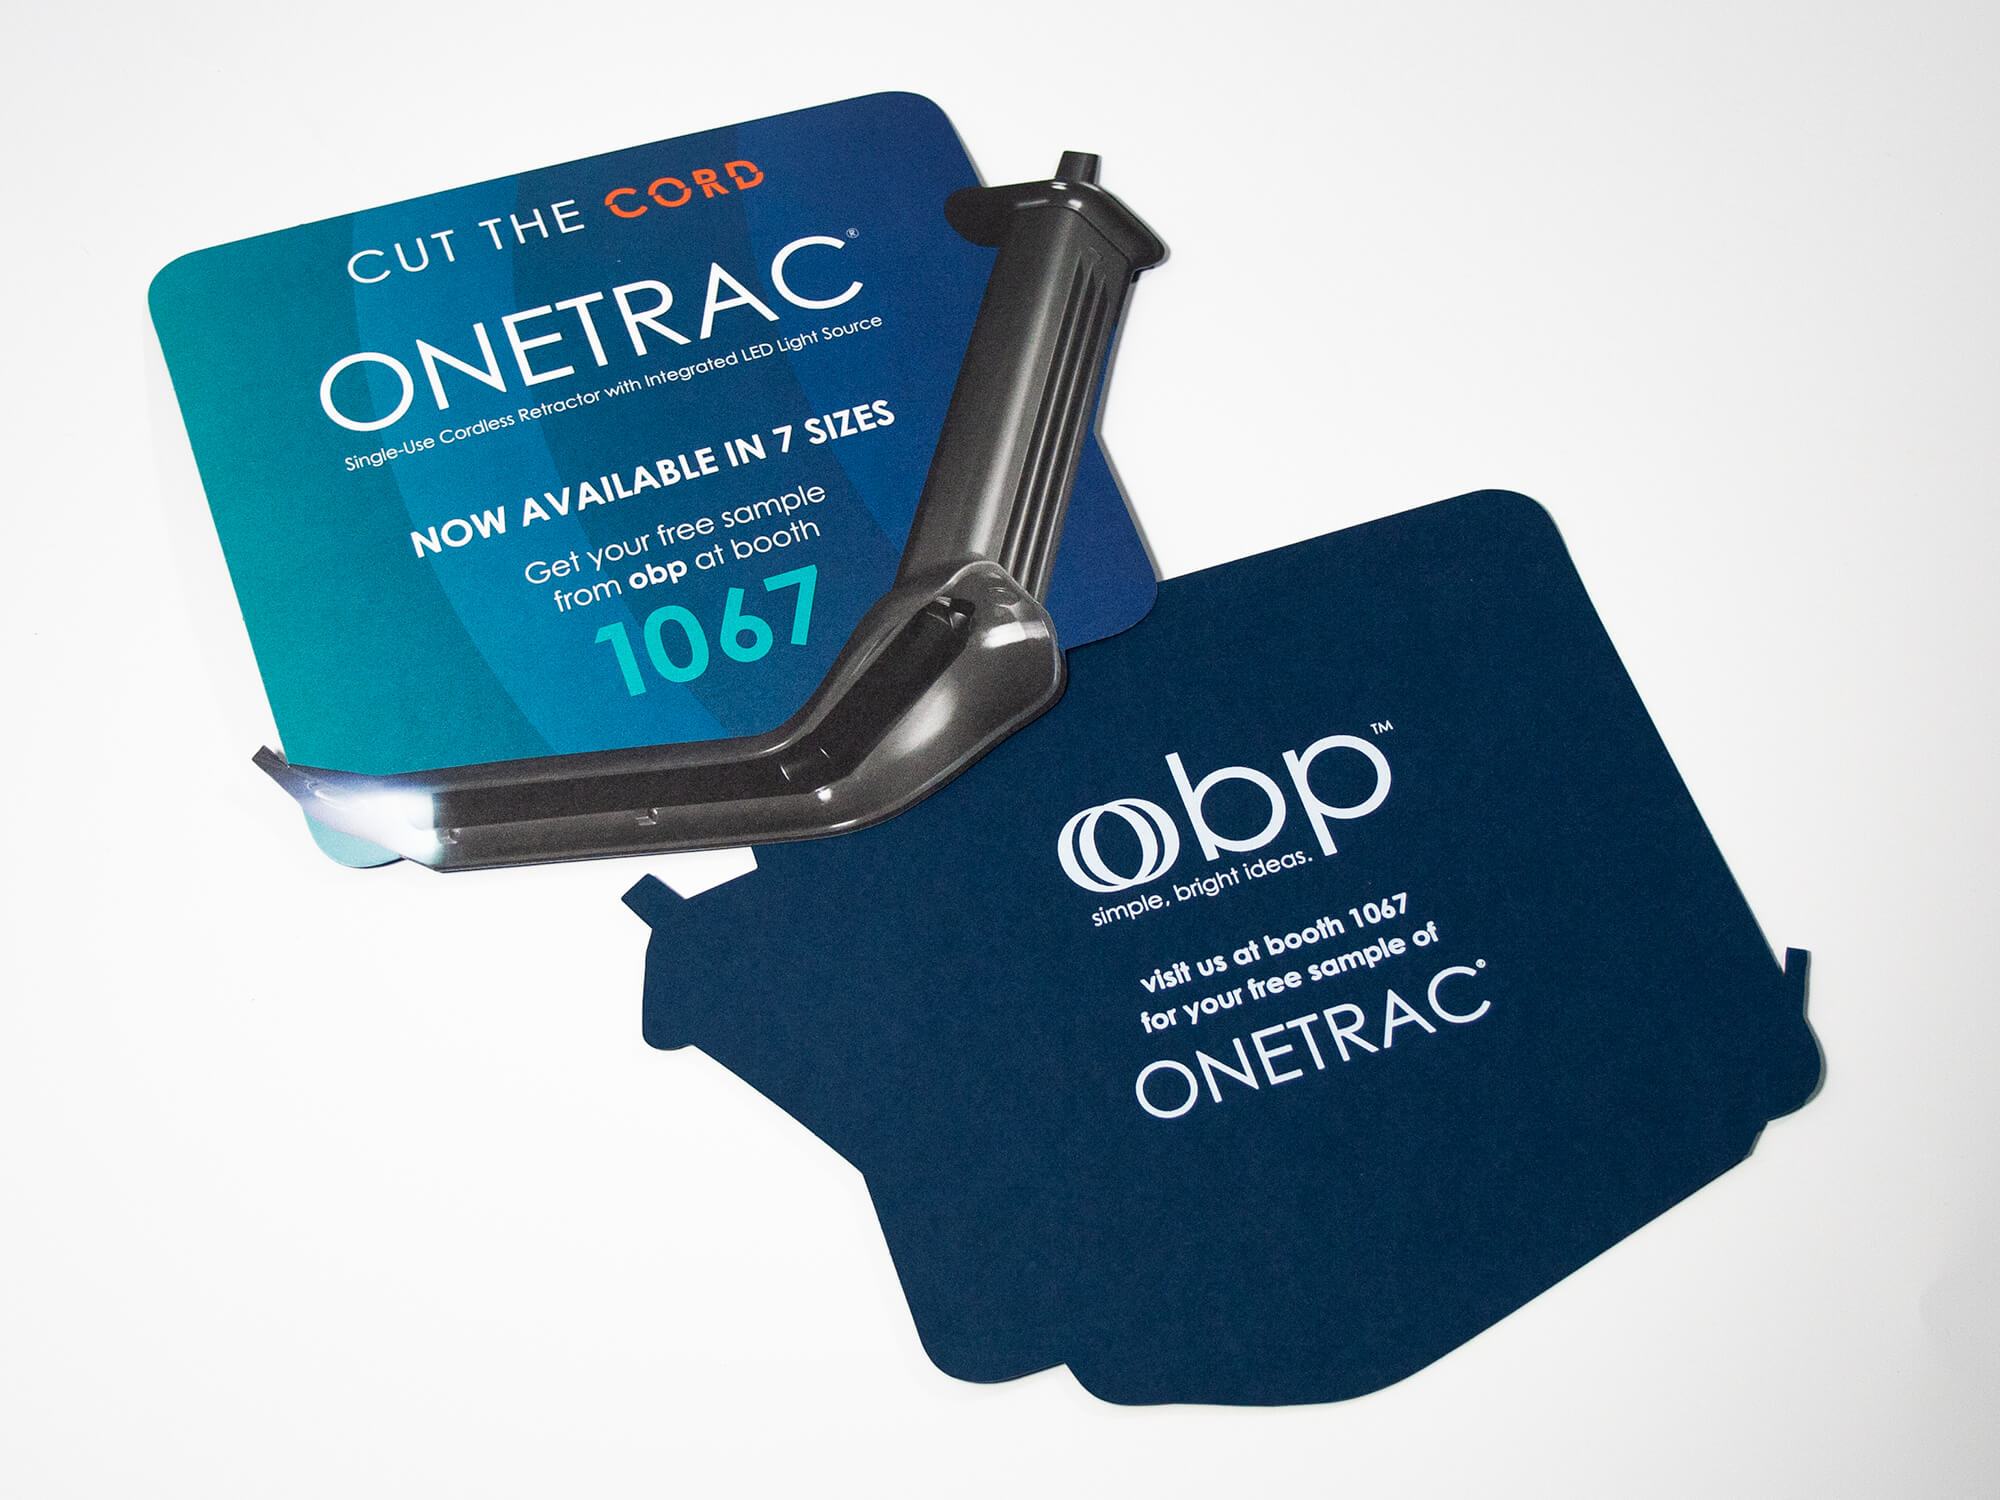
Pro Tip: As we noted above, bleeds are crucial when it comes to die-cutting. But what do you do when your image has hard edges and no bleed? Sometimes, as in this case with obp’s product image, you’ll have to manually create a bleed. Using the clone stamp tool in Photoshop, we extended the edges of the product image to create a bleed allowance. This ensured that no white edges appeared on the final die-cut piece.
Charles River Labs Booklet with Die-Cut Product Window
Creating unique materials to showcase new products is an important part of any product launch. Most brands won’t be able to rely on digital photos alone. They need to show physical samples alongside helpful information and technical product specs.
When Charles River Labs was ready to announce their revolutionary Endosafe Cartridge their designers needed something special. We helped their team brainstorm options and create prototypes before ultimately settling on a product booklet with die-cut pages and a tipped on product sample. This window approach gave the new product a prominent spot on every page of the booklet.
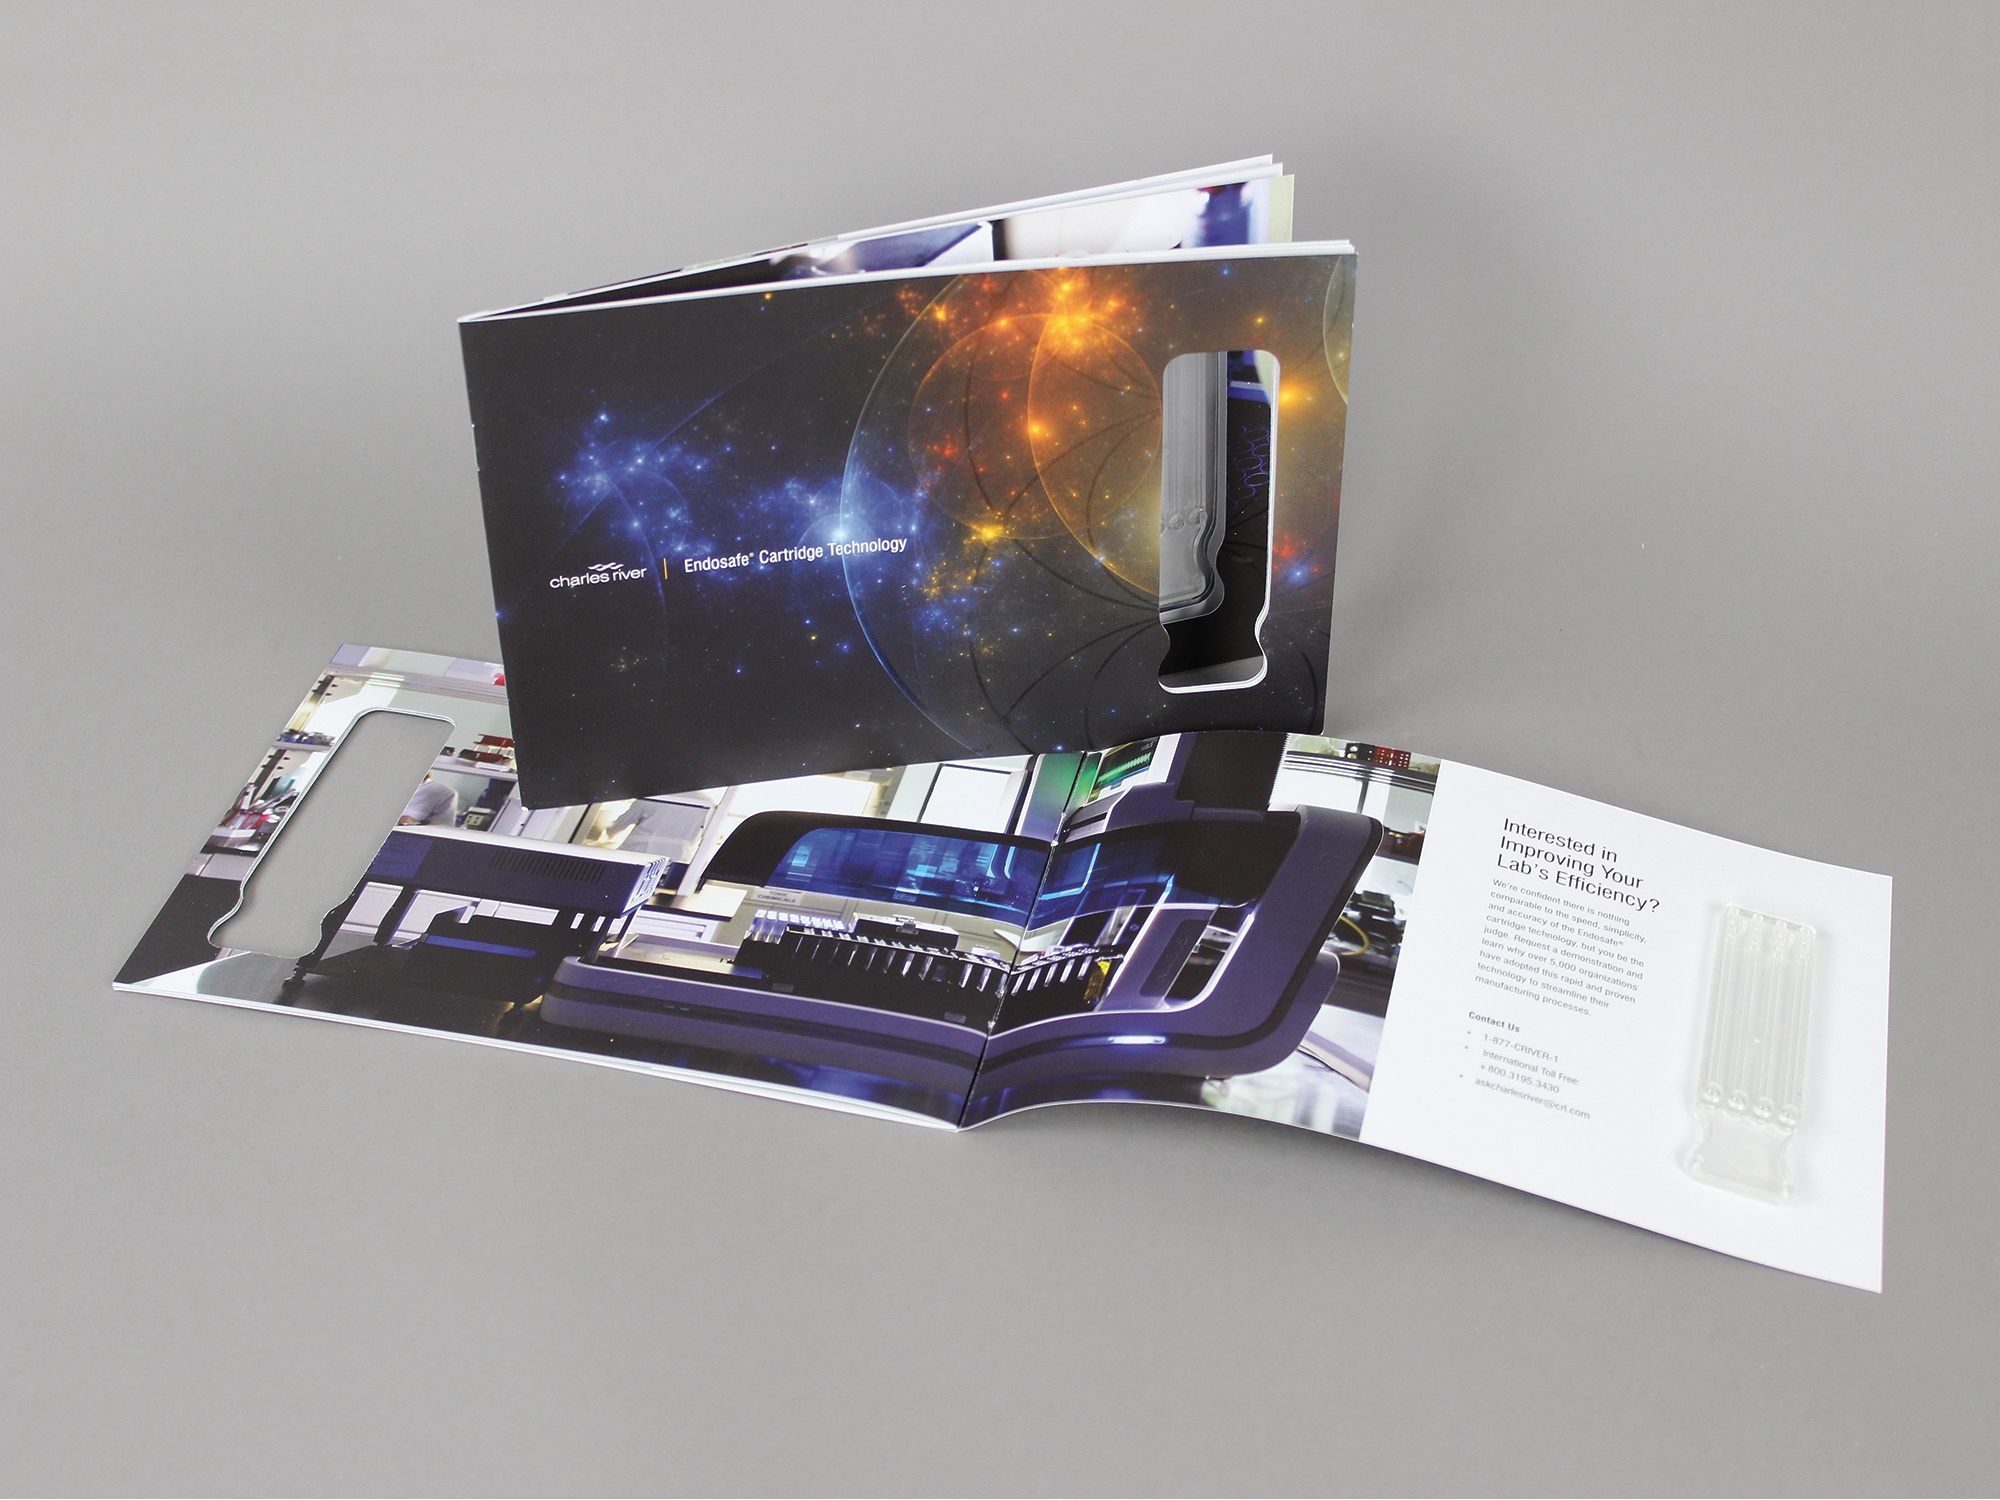
Pro Tip: When creating dielines, mathematical precision is important. Save yourself time and stress by using the alignment tools in Illustrator to ensure that every corner is accurate. Did you know you can perform basic calculations (such as addition, subtraction, multiplication, and division) right in the Width and Height transform panels in Illustrator and InDesign? This is a huge help when you need to create a pocket that’s exactly ¼ the height of your page, or if you need to add a fold that’s 3” in from the edge. Simply type and hit enter.
Candlewick Press “Princess in Black” Die-Cut Promotion
Die-cuts can add interactivity to your next marketing or direct mail campaign. They can be used for takeaway materials like the black mask and character pieces in this promotion for Candlewick Press. By inviting their audience to physically interact with the piece by punching out a mask and ring, Candlewick Press was able to increase engagement and ensure their promotional materials had staying power.
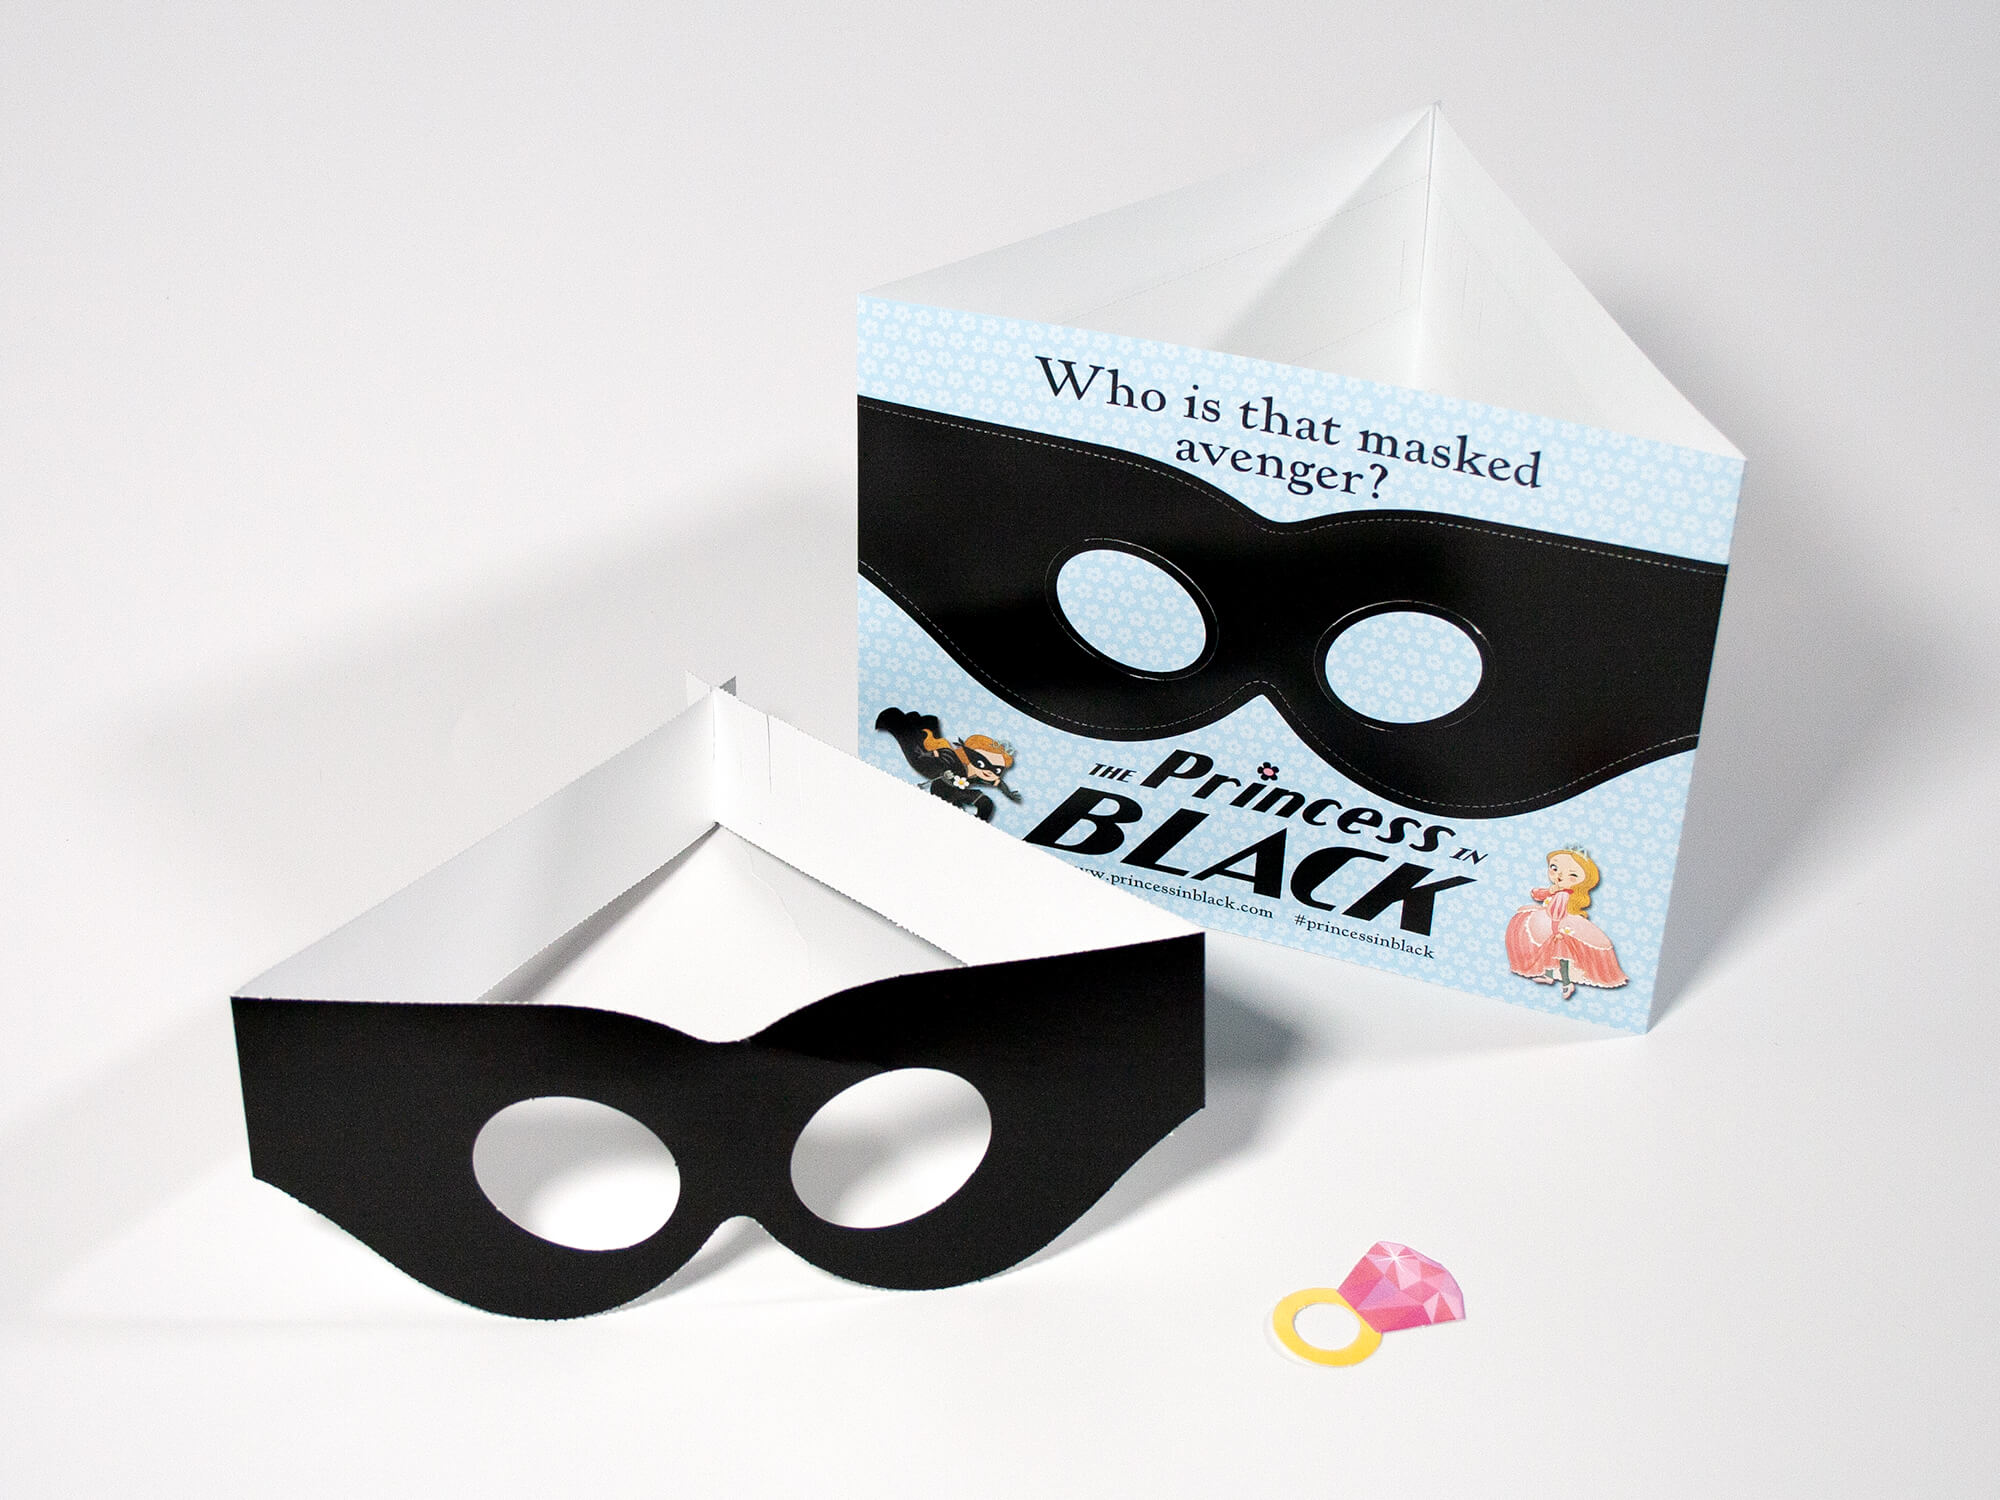
Pro Tip: When creating the dieline for your printer to use when die-cutting, it’s important to place it on its own layer and label it appropriately. Once you have that layer created it’s also a good idea to fill it with a spot color which makes it clear to the printer that the dieline should not be printed. You’ll also want to select “Overprint Stroke” for the dieline layer to ensure that you’re not left with a fine white line where the dieline knocks out.
Babson College Centennial Year Reunion Invite Mailer
This reunion mailer for Babson College includes a die-cut 100 to highlight their centennial year. Rather than creating a simple circle die-cut, they wanted to include cross-hairs within the zeroes. At the same time, they wanted to ensure that recipients could easily see photos through the die-cut numbers. To make this strategy successful, Shawmut recommended that they increase the width of the cross-hair lines to ⅛ of an inch to ensure they would not be damaged or torn during the die cutting process.
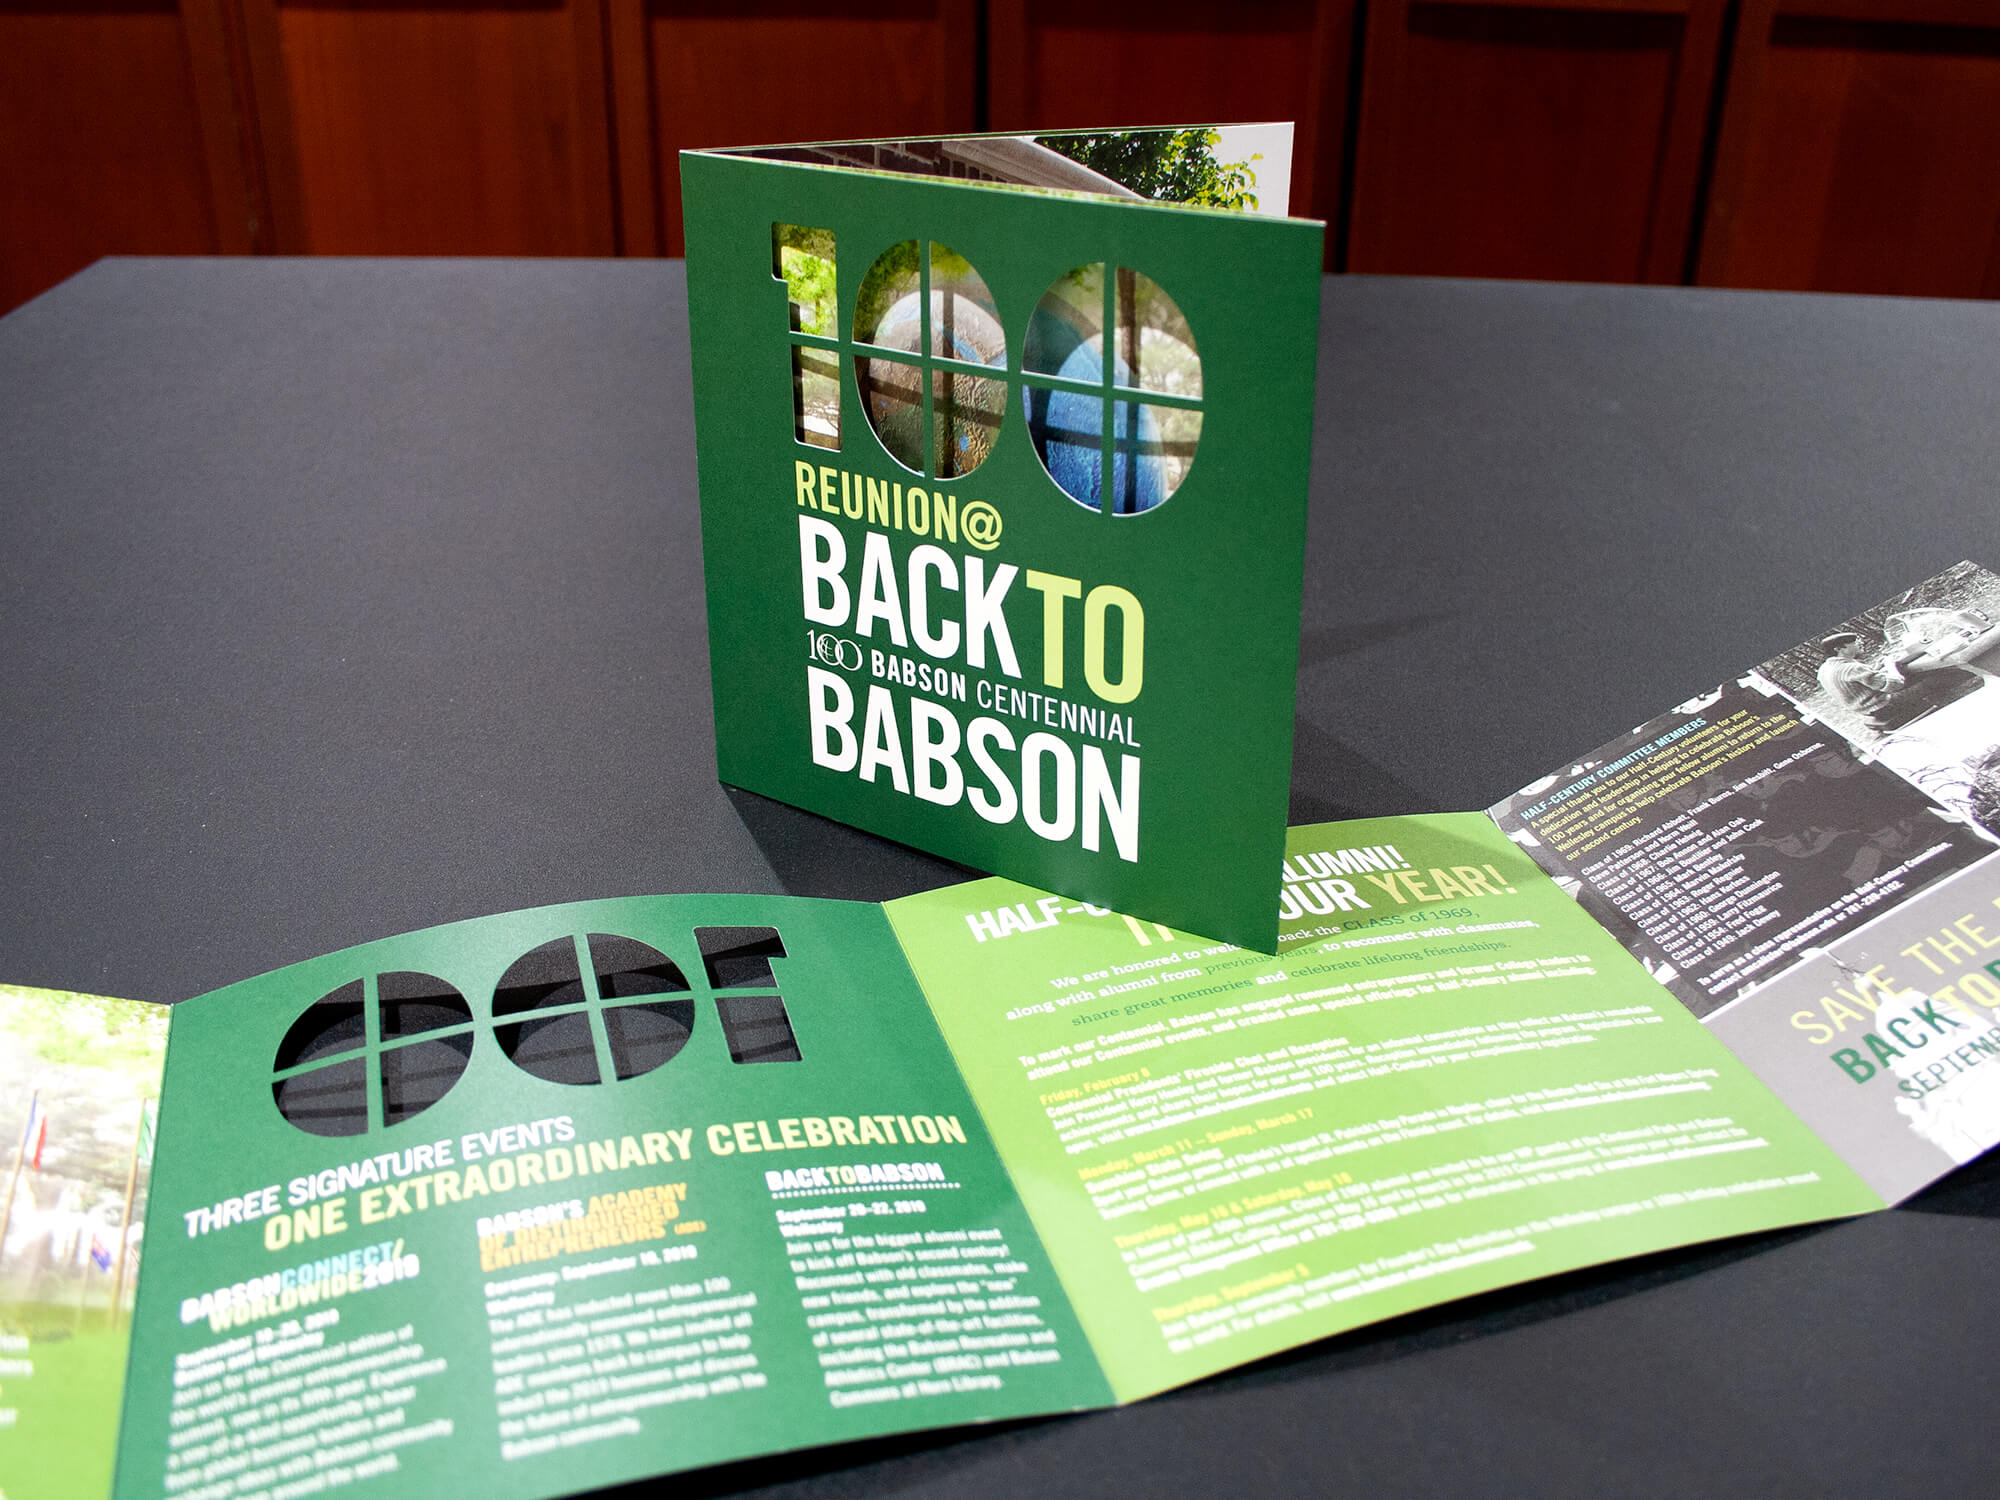
Pro Tip: When creating a die-cut to achieve a knockout or window effect, you’ll want to make sure that the pieces left behind are strong enough to remain intact. This is particularly true if your die-cut project will be mailed or requires significant handwork and assembly during the finishing process. Although it will somewhat depend on the paper stock you’re working with, leaving ⅛ of an inch is fairly standard practice.